Pinecone Wreath DIY: A Natural Wreath That Lasts
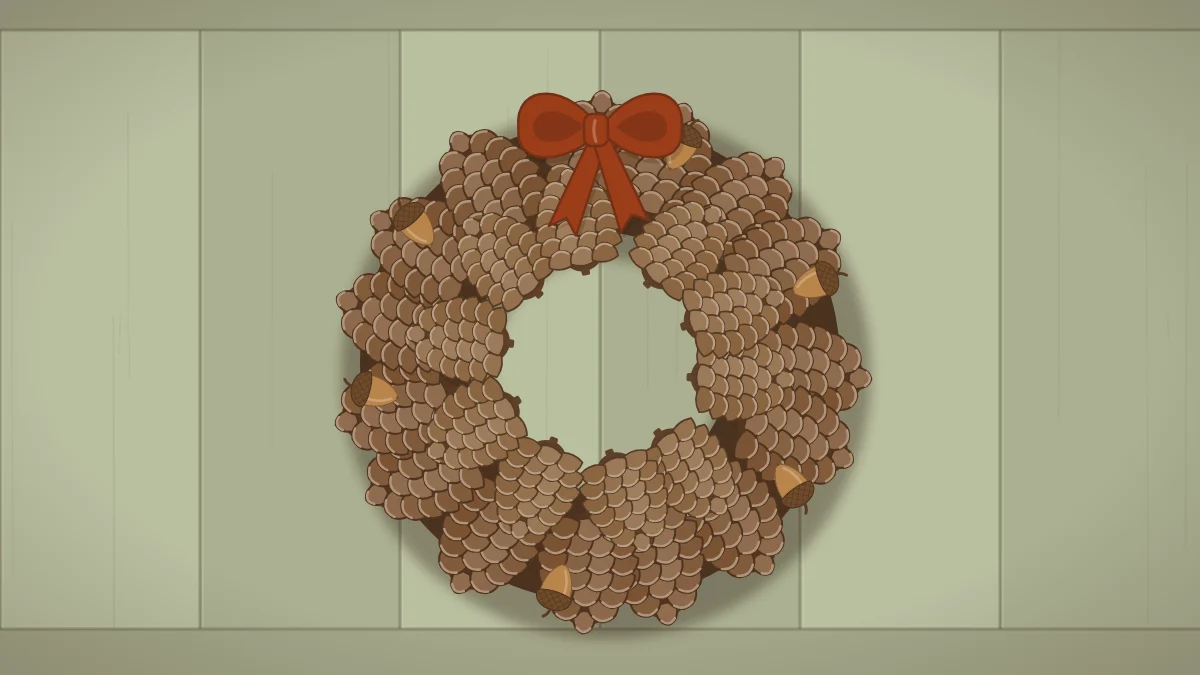
Collect, air-dry and sort pinecones, then wire them to a grapevine or wire base in two rings and fill the gaps with small cones and acorn caps. Includes rough cone counts.
Project at a glance
What you need
- 14 in (36 cm) grapevine or wire wreath base
- About 30 to 40 medium and large pinecones
- About 15 to 25 small pinecones
- Acorn caps for filling
- Floral wire and wire cutters
- Low-temperature glue gun
- White acrylic craft paint (optional)
A pinecone wreath DIY project starts outdoors, with a bag and a walk, and ends with one of the sturdiest natural wreaths you can make. Cones are woody, they hold their shape, and a well-made wreath can often be brought out for several seasons if it is kept dry.
The method is simple: prepare the cones patiently, sort them by size, fix the large ones to a base in two rings, then fill every gap with small cones and acorn caps.
Collecting pinecones
Gather cones that have already fallen, choosing ones that are whole, firm and not soft or moldy. Collect only where it is allowed: your own yard, or public land where gathering is permitted. Many parks and nature reserves ask visitors to leave natural materials where they are, so check first.
Pick up more than you expect to use, in as many sizes as you can find. Craft cones sold in bags are a fine substitute and usually arrive clean and open.
Preparing pinecones without heat
Fresh cones can carry dirt, sticky sap and the occasional insect, and damp cones are often closed tight. Time and dry air solve all of that.
- Brush them off. Use a dry, stiff brush or an old toothbrush to remove soil, needles and loose debris. Do this outside.
- Spread them out. Lay the cones in a single layer on newspaper or in a shallow cardboard box, somewhere dry indoors with good air flow.
- Wait. Leave them for several days, turning them once or twice. As they dry, closed cones slowly open. Very wet cones can take a week or longer.
- Inspect. Check each cone for insects, webs or soft spots. Tap it over the paper, and set aside any that look doubtful.
Cones open as they dry and close again when they get damp; it is how the tree protects and then releases its seeds, as the article on the conifer cone explains. This is also why a pinecone wreath belongs somewhere dry: cones that close up on a wet porch can loosen in their wires.
Tip
Sap is sticky and hard to wash out of fabric. Wear old clothes and thin work gloves while you brush and sort, and cover the table.
Sorting and how many cones you need
Sort the dry cones into three piles: large, medium and small. Similar sizes side by side are what make the rings look neat.
For a 14 inch (36 cm) base, plan on roughly 30 to 40 medium to large cones, around 2 to 3 inches (5 to 7.5 cm) wide, for the two main rings, plus about 15 to 25 small cones for filling. That is an estimate, so prepare extra.

Choosing a base
A grapevine base is the easiest choice. It is brown, so small gaps vanish, and wire passes between the twigs anywhere you like. A wire frame also works, but wrap it in brown ribbon or burlap strips first so none of it shows.
Either way, attach the hanging loop before you start. Twist a doubled length of floral wire around the base, form a loop at the back, and mark that point as the top.
Wiring and gluing the cones in two rings
Wire carries the weight; glue stops things from turning. Using both gives the strongest wreath.
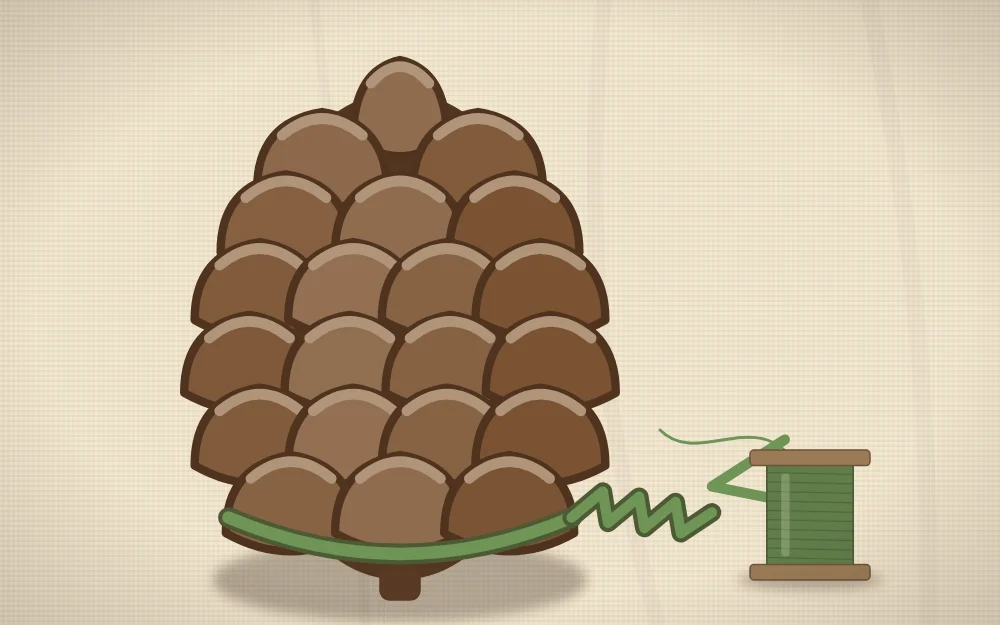
- Wire each large cone. Cut about 10 inches (25 cm) of floral wire. Slip the middle of it between the lowest row of scales, wrap it around the core of the cone and twist the two ends together tightly so they form a single tail.
- Build the outer ring. Hold a large cone against the outer edge of the base with its tip pointing outward. Pass the wire tail through the base, twist it at the back and tuck the end in. Add the next cone snugly beside it and continue around.
- Build the inner ring. Wire the medium cones around the inner edge the same way, tips pointing toward the center or slightly forward. Nestle each one into the dip between two outer cones.
- Glue where needed. Where cones wobble, add a dab of glue from a low-temperature glue gun at the point where they touch each other or the base.
A low-temperature glue gun still burns skin, so hold cones by their tips, not near the glue. Wire ends are sharp; bend each one back into the base.
Filling the gaps
Hold the wreath up and look for places where the base shows through, especially along the line between the two rings. Glue small cones into those spaces, tips forward, pressing each one down among its neighbors. Then add the smallest details:
- Acorn caps, glued in open side down, look like tiny wooden buttons between cones.
- Whole acorns add a smooth texture, though they can crack or drop their caps as they dry, so glue the cap and the nut separately.
The guide to acorn crafts covers collecting and drying acorns so they are ready to use. Keep small loose pieces such as acorns away from small children and pets.
Optional: dry-brushed white tips
For a frosted look, dip just the ends of a dry, flat brush in white acrylic craft paint, wipe most of it off on scrap paper, then sweep the brush lightly across the tips of the scales. The paint should catch only the edges. It is easiest to do this before the cones go on the wreath. Let the paint dry as directed on the label.
A clear acrylic sealer is optional. If you use a spray, apply it outdoors and follow the label.
Where to hang it and how long it lasts
Hang a pinecone wreath indoors or on a covered porch where rain and damp cannot reach it. It is heavier than a leaf or burlap wreath, so use a sturdy hook, and make sure it does not swing into the walkway when the door opens. Cones are dry wood, so keep the wreath well away from fireplaces, heaters and any open flame.
Kept dry and stored in a sealed bin, a pinecone wreath often lasts for several years, though a scale or a filler may need regluing each fall. For the general rules on layout and balance, see how to make a fall wreath, and if you have cones left over, there are smaller projects in pinecone crafts for fall.
Frequently asked questions
How many pinecones do I need for a wreath?
For a 14 inch base, plan on roughly 30 to 40 medium to large cones for the two main rings and about 15 to 25 small ones for filling gaps. Cone sizes vary widely between trees, so gather or buy more than that and sort them before you begin.
How do I get closed pinecones to open?
Give them dry air and time. Spread closed cones in a single layer indoors, somewhere with good air flow, and leave them for several days to a week or more. They open gradually as moisture leaves the scales. Cones that get damp again will close, so store them dry.
Can a pinecone wreath stay outside?
A covered porch or a sheltered door is fine, but avoid spots where rain or heavy damp can reach it. Moisture makes the cones close, which can loosen wires and glue, and it encourages mold. In an exposed location, hang the wreath indoors instead.