Thanksgiving Table Decor Ideas for a Handmade Table
Plan a handmade Thanksgiving table that still fits the food: a narrow, low centerpiece on lift-off trays, paper-leaf place cards, wrapped napkins and a prep schedule.
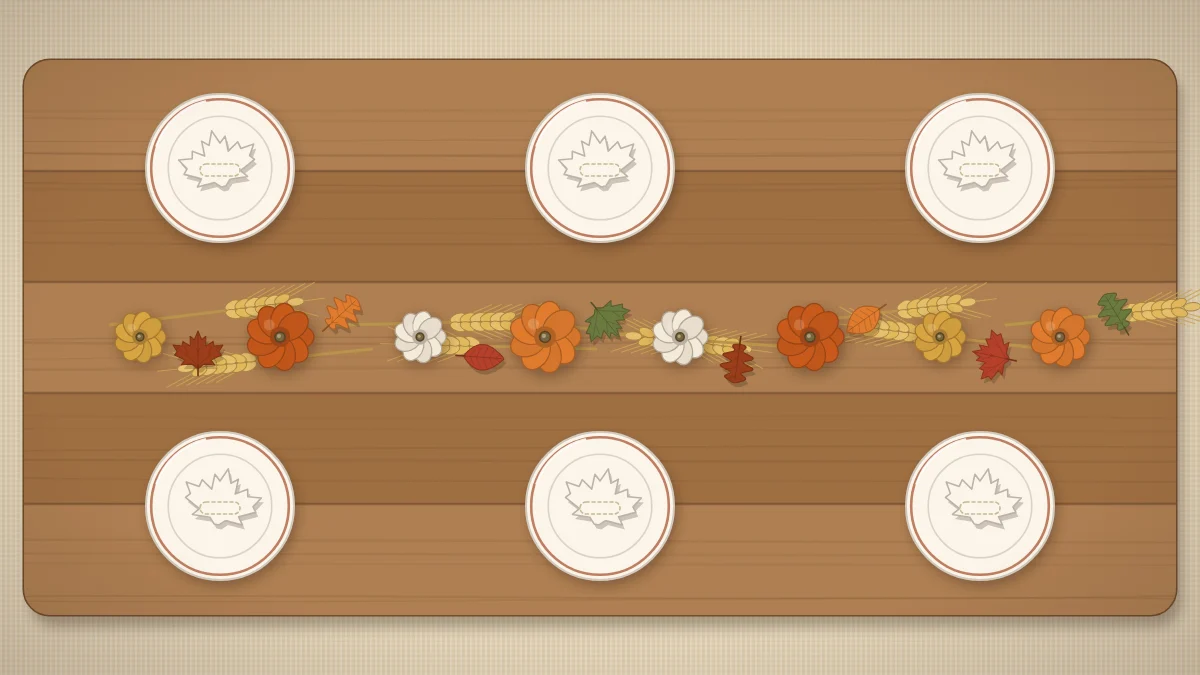
The most useful Thanksgiving table decor ideas begin with an awkward fact: on this one day, the food needs the table more than the decorations do. Platters, bowls, a gravy boat and a bread basket all want the same space as your pumpkins.
So plan the decor around the meal. Keep it narrow, keep it low, and build it so that part of it can be lifted away in seconds when the dishes come out. Everything below is handmade and can be prepared ahead.
Decide How the Food Will Be Served
This single decision shapes the whole table, so make it before you cut a leaf.
- Family style, dishes on the table: the centerpiece must be short in length or removable in sections.
- Buffet from a sideboard or counter: the table only holds plates, glasses and bread, so the center line can run nearly end to end.
- A mix: main dishes on the buffet and a few sides on the table. Plan two gaps in the center line for them.
A Narrow, Low Center Line
On most dining tables the center strip that stays free is about 10 to 12 inches (25 to 30 cm) wide. Keep the decor inside it. A runner helps, because its edges show you exactly where to stop; this fall table runner can be made a few days ahead.
Keep the height under roughly 10 inches (25 cm) so everyone can see across the table and pass dishes over it. Small pumpkins, gourds, short wheat bundles laid on their sides, pinecones and leaves all fit that limit.
Build the line from the middle outward: the largest pumpkin at the center, smaller ones stepping down toward each end, and leaves and wheat filling the spaces between. You will find more arrangements that suit a long line in these fall centerpiece ideas.
Build It on Trays So It Lifts Off
The simplest way to make a centerpiece removable is to build it on something. Three small trays, cutting boards or shallow baskets placed end to end look like one continuous line and behave like three separate pieces.
- Choose three trays or boards about 10 to 12 inches (25 to 30 cm) long. They do not need to match if they are a similar color.
- Line them up along the runner with the ends touching.
- Arrange each tray as a small complete group: one or two pumpkins, a few leaves, a little wheat and one flameless LED candle.
- Bridge the joins with a loose leaf or a pinecone laid across the gap, so the seams disappear.
- When the food arrives, lift off the end trays and leave the middle one.
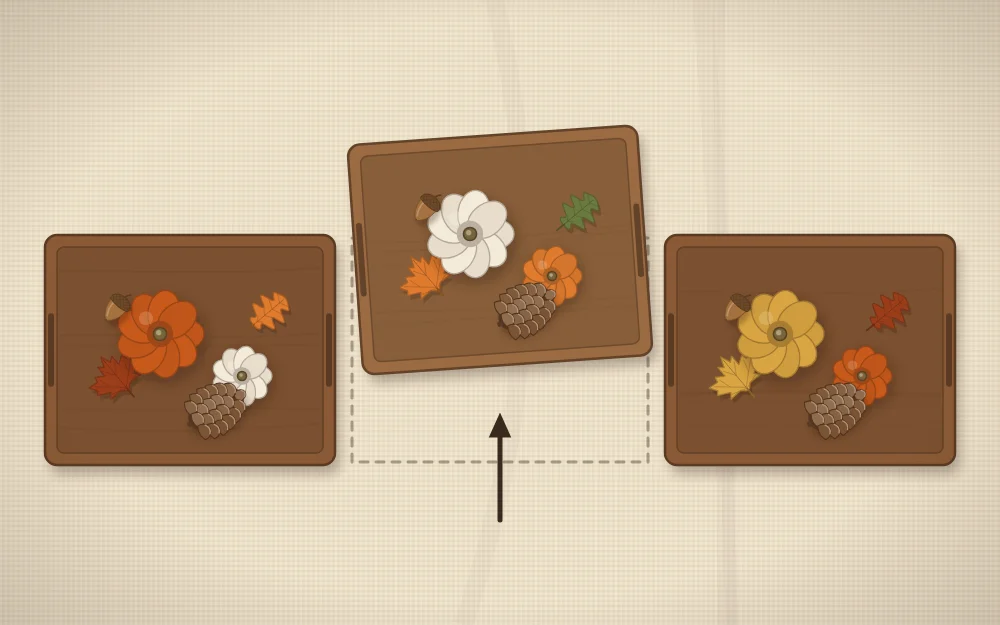
Decide in advance where the lifted trays will go, such as a windowsill or a side table.
Flameless Light Only
A Thanksgiving table is crowded with sleeves, serving spoons and passing hands, and the centerpiece is made of dried leaves, wheat and paper. Use flameless LED candles only, and never real candles, among these materials.
Flameless LED pillar candles in two heights give a soft glow from inside the line. Battery LED tea lights tucked between pumpkins add small points of light, and a thin strand of battery string lights can run the full length with the battery pack hidden under a leaf.
Safety note
Dried stems, leaves, burlap and paper burn easily. Keep the centerpiece away from warming trays, hot serving dishes and any other heat source, and set hot dishes on trivets in the gaps, not against the decor.
Paper-Leaf Place Cards
Place cards save the shuffle at the door and give each setting a handmade detail. Paper leaves take a few minutes each and can be cut days ahead.
- Cut a leaf template about 3 to 4 inches (7.5 to 10 cm) long from scrap cardboard.
- Trace it onto cardstock in rust, mustard, olive and cream, and cut one per guest plus two or three spares.
- Crease each leaf lightly down the middle for a center vein.
- Write the name along the vein and let the ink dry fully before stacking.
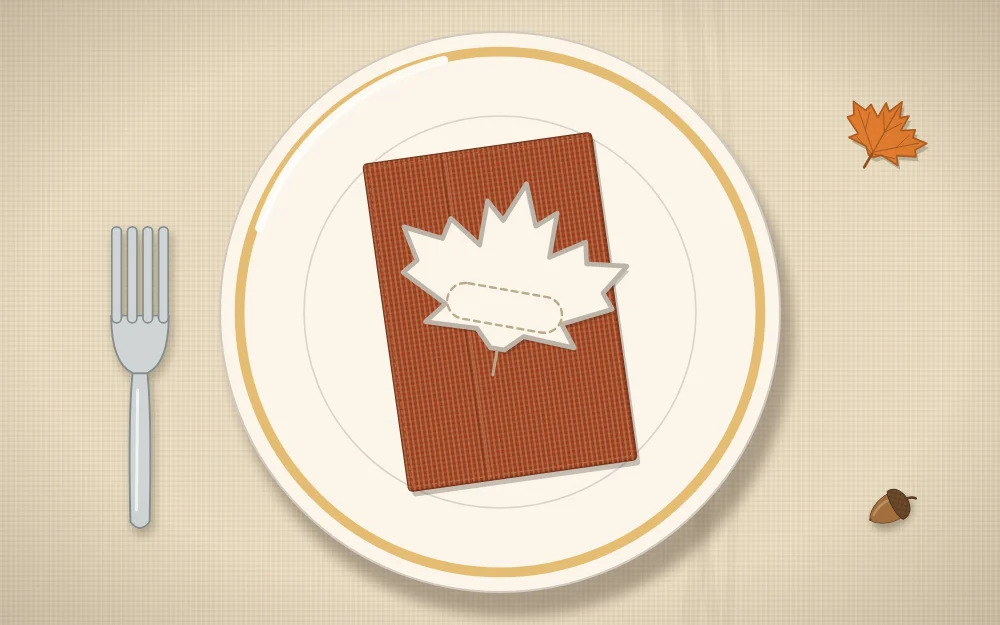
Because the leaf sits on the napkin, it uses no extra room. If you would rather stand the cards up, or want a full layered setting with chargers and holders, see these fall place setting ideas.
A Wrapped-Napkin Detail
A wrapped napkin does two jobs: it adds color at every seat and holds the place card and the flatware together, which clears space beside the plate.
- Fold the napkin into a long rectangle about 4 inches (10 cm) wide.
- Lay the fork and knife on top, or leave them out for a flatter bundle.
- Wrap a length of twine or narrow ribbon, roughly 16 inches (41 cm), twice around the middle and tie a simple knot.
- Slip the paper leaf under the twine. Add one short sprig of rosemary or a wheat tip if you like.
Keep dried wheat and foraged pieces on the napkin rather than on the eating surface.
The Buffet or Sideboard Version
When the food is served from a sideboard, the decorating rules flip. The buffet needs clear, flat space along the front for dishes, and the decor moves to the back and the ends.
- Put height at one end only: a tall jar of wheat or branches, set behind where the plates will stack.
- Run a low line of mini pumpkins and leaves along the back edge, against the wall.
- Leave the front two thirds of the surface empty for serving dishes and trivets.
- Keep every dried piece away from warming trays, slow cookers and other hot appliances.
Days Ahead Versus the Morning Of
| When | What to do |
|---|---|
| 3 to 5 days ahead | Cut and write place cards. Wash and press napkins. Make or iron the runner. Choose the trays. |
| 2 days ahead | Buy or gather pumpkins and gourds. Brush off dried materials and check them for insects. Test LED lights. |
| The day before | Lay the runner, build the three trays, set plates and glasses, wrap the napkins. |
| The morning of | Add fresh leaves or herbs, set out place cards, switch on the lights and clear a landing spot for lifted trays. |
Real pumpkins, gourds and fresh leaves are perishable. They often last a few weeks in cool, dry conditions, but fresh leaves curl within a day or two indoors, which is why they wait until the morning.
Frequently asked questions
How do I decorate a Thanksgiving table and leave room for food?
Keep the decor inside a center strip about 10 to 12 inches wide and under roughly 10 inches tall. Build it on two or three small trays placed end to end, so you can lift off a section when platters arrive. Put place cards on the napkins to free up space beside each plate.
Should I use real or flameless LED candles on a Thanksgiving table?
Use flameless LED candles, battery LED tea lights or battery string lights instead of real candles. Dried leaves, wheat, paper and burlap burn easily, and a holiday table is busy with reaching arms and passing dishes. Flameless lights give a similar warm glow and can sit right among the leaves.
What Thanksgiving table decor can I make ahead?
Place cards, the runner and the napkin ties can all be finished three to five days early. Build the centerpiece trays and set the plates the day before. Leave fresh leaves and herbs for the morning of the meal, because they curl and dry out quickly indoors.