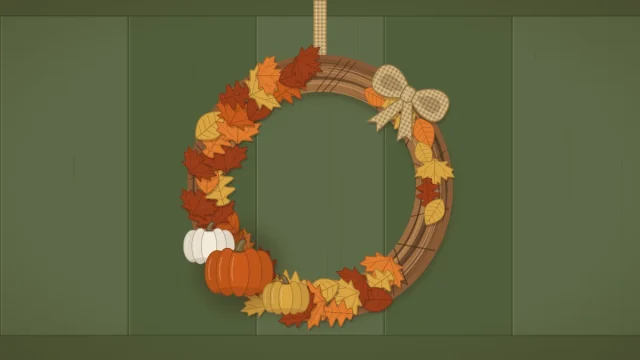
DIY Fall Leaf Wreath with Felt Leaves
Build a full felt leaf wreath on a 12 or 14 inch ring. Approximate leaf counts by size, three color orders, and the shingle overlap that hides every stem end.

Project at a glance
What you need
- 12 or 14 in (30 or 36 cm) wire or foam ring
- 5 to 7 sheets of craft felt in fall colors
- Felt or ribbon strips to wrap the ring
- Sharp scissors and a paper leaf template
- Low-temperature glue gun
- Ribbon or twine for the loop
A DIY fall leaf wreath made from felt has two big advantages over one made from real leaves: it does not crumble, and it looks the same next October as it does today. The whole project is cutting, sorting and gluing, with no wiring and no special skills.
The secret to a wreath that looks full rather than patchy is in how the leaves overlap. Laid like shingles on a roof, all pointing the same way, even plain oval leaves turn into a rich, layered ring.
What you need
- A 12 inch (30 cm) or 14 inch (36 cm) ring: a flat wire frame or a foam wreath form
- Craft felt in three or four fall colors
- Strips of felt, ribbon or fabric to wrap the ring
- Sharp scissors and a paper leaf template
- A low-temperature glue gun and glue sticks, or tacky craft glue
- About 12 inches (30 cm) of ribbon or twine for the hanging loop
If you have not cut felt leaves before, start with the guide on how to make felt leaves, which covers templates, clean cutting and three ways to add veins. This wreath uses leaves about 3 inches (7.5 cm) long, with a pinched center fold so they stand up slightly from the ring.
How many felt leaves you need
Leaf counts depend on the size of your leaves and how tightly you overlap them, so treat these numbers as a starting estimate and cut a few spares. They assume 3 inch leaves laid three across, with each row covering about half of the row before it.
| Ring size | Leaves (approximate) | Per color, using four colors | Felt sheets, 9 x 12 inches (23 x 30 cm) |
|---|---|---|---|
| 12 inches (30 cm) | About 65 to 75 | Roughly 16 to 19 | About 5 to 6 |
| 14 inches (36 cm) | About 80 to 90 | Roughly 20 to 23 | About 6 to 7 |
Smaller leaves need more pieces and give a finer texture; larger leaves cover faster but can look sparse on a 12 inch ring.
Prepare the ring
Glue holds far better on fabric than on bare wire or slick foam, and a wrapped ring also hides any gaps between leaves.
- Cut strips of felt, ribbon or scrap fabric about 1.5 inches (4 cm) wide, in a color close to your leaves.
- Glue one end to the back of the ring and wrap around and around, overlapping each turn slightly, until the ring is covered.
- Glue the end down at the back and trim.
On a wire frame with several rings, wrap all of the wires together as one flat band. Tie the hanging loop on now and treat that point as the top.
Choose a color order
Sort the leaves into piles by color before you glue anything. Then decide how the colors will travel around the wreath:
- Scattered: pick from each pile in turn so no two neighbors match. This is the classic mixed look and the most forgiving.
- Gradient: work through the colors in order, for example olive to mustard to orange to rust, blending a few leaves of each color into the next where they meet.
- Blocks: divide the ring into quarters and give each one a color for a bolder, more graphic wreath.

Three or four colors are plenty. If you are not sure which shades belong together, the guide to fall color palette ideas has ready-made combinations.
Glue the leaves like shingles
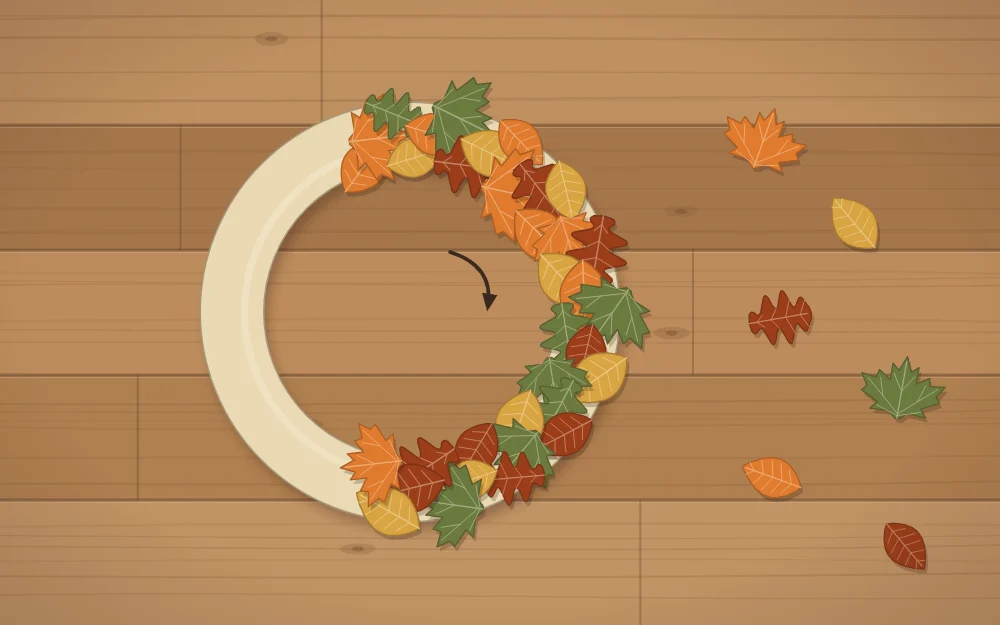
- Pick a direction. Decide whether the leaf tips will point clockwise or counterclockwise, and keep to it for the whole wreath.
- Lay the first row. Glue three leaves side by side across the ring: one angled toward the inner edge, one along the center and one angled toward the outer edge. Put glue only on the stem end, about the bottom third of each leaf, and leave the tip free.
- Overlap the next row. Move back about 1.5 inches (4 cm) and glue the next three leaves so their tips cover the glued stem ends of the first row.
- Stagger as you go. Shift each row slightly so the leaves sit between those of the row before, like bricks, rather than lining up in stripes.
- Close the circle. When you reach the start, lift the loose tips of the very first row and tuck the last stem ends underneath them, then glue them down.
Tip
Gluing only the stem end is what gives the wreath its depth. Leaves glued flat from end to end look stiff, while free tips lift, curl a little and cast small shadows.
A low-temperature glue gun is the fastest option, but it still burns skin, so press each leaf down near the stem with a craft stick. Tacky craft glue works too; it simply needs more drying time, as stated on its label, before the wreath can be lifted.
Check and finish
Hold the wreath up by its loop and look for bare spots along the inner and outer edges, which are the easiest places to miss. Slide a spare leaf under the tips of its neighbors and glue it in, then trim any threads of glue.
You can stop there or add one small accent, such as a bow or a cluster of felt acorns, at about 7 o’clock. The general rules for placing accents and balancing a wreath are in the beginner’s guide on how to make a fall wreath.
Using preserved real leaves instead
The same shingle method works with real leaves that have been pressed or preserved, with color variation that felt cannot match. It is also much more fragile. Dry leaves crack when bent, their tips break off when brushed by a sleeve or a closing door, and their colors soften toward brown over the weeks.
If you want to try it, use a foam form wrapped in ribbon, handle the leaves by their stems, glue with tacky craft glue rather than hot glue, and hang the wreath indoors where nothing will knock it.
Hanging and care
Felt does not like rain, so hang this wreath indoors or on a door that is fully under cover. Bright sun fades felt over time. Keep the wreath well away from heaters and any open flame.
To clean it, shake it gently or go over it with a lint roller. Store it flat in a box with nothing resting on top, so the leaf tips keep their lift for next fall.
Frequently asked questions
How many felt leaves does a 14 inch wreath need?
Plan on roughly 80 to 90 leaves about 3 inches long for a 14 inch ring, and about 65 to 75 for a 12 inch ring. The exact number depends on leaf size and how closely the rows overlap, so cut ten or so extra to fill thin spots at the end.
Should I use a wire frame or a foam form for a felt leaf wreath?
Both work. A flat wire frame is light, thin and sits close to the door, but it must be wrapped so the glue has something to grip. A foam form gives a rounder, fuller profile and a wide gluing surface, though it is bulkier to store. Wrap either one first.
Can a felt leaf wreath hang outside?
Only in a fully sheltered spot, such as a covered porch or behind a storm door. Felt soaks up rain, sags when wet and fades in strong sun, and glue can loosen in the cold. Bring it indoors in wet or windy weather to keep it looking fresh.