DIY Cornucopia Centerpiece: A Paper and Burlap Horn of Plenty
Roll a poster board cone, bend the tip, wrap it in burlap or twine and fill it with pumpkins, gourds and wheat for a handmade horn of plenty centerpiece.
Project at a glance
What you need
- 22 x 28 in (56 x 71 cm) poster board or heavy kraft paper
- Burlap strips or jute twine
- Tacky craft glue
- Low-temperature glue gun
- Masking tape and scissors
- Thin cardboard strip for the rim
- Mini pumpkins, gourds, wheat and felt leaves
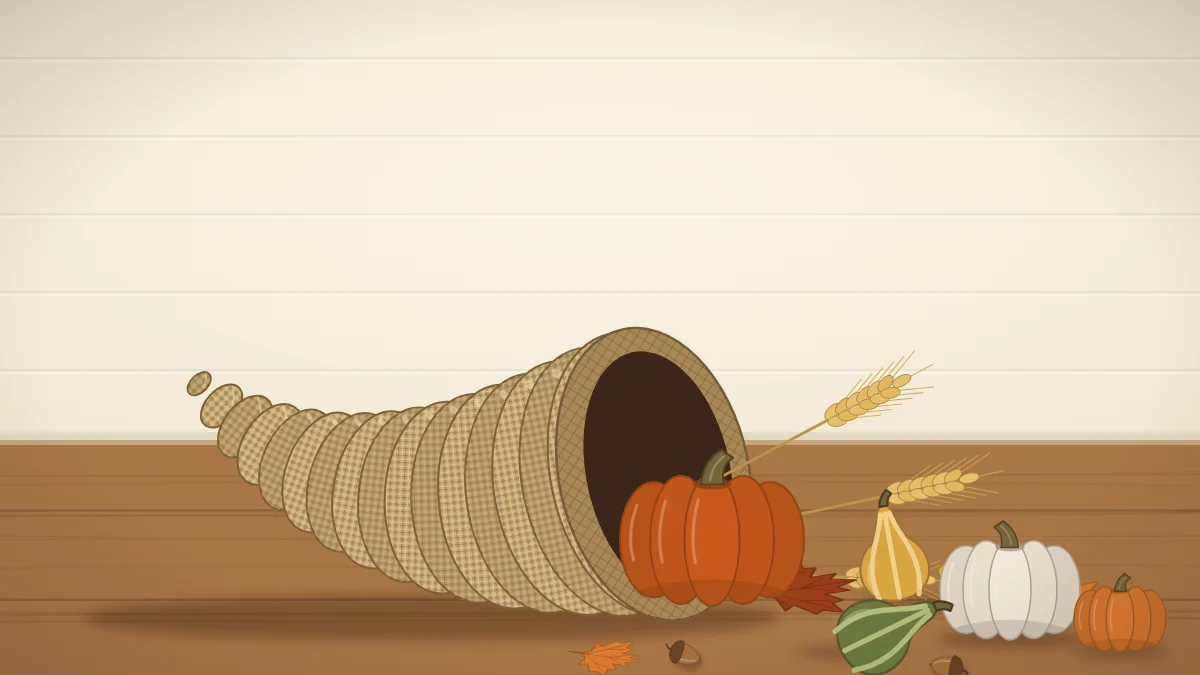
A DIY cornucopia centerpiece looks like a basket-weaving project, but the horn itself is only a paper cone with a bent tip and a burlap wrap. Once the shape is made, you fill it with pumpkins, gourds, wheat and leaves so they spill forward onto the table.
The horn takes an easy afternoon, most of it glue drying time. The filling is where you can mix craft pieces with real produce and change it as the season goes on.
What a Cornucopia Is
The cornucopia, or horn of plenty, is a long-standing symbol of harvest and abundance: a curved horn overflowing with fruit, grain and vegetables. As table decor it works for the same reason. It gathers many small seasonal things into one generous shape.
Materials
- One sheet of poster board, 22 by 28 inches (56 by 71 cm), or heavy kraft paper of a similar size
- Burlap, about half a yard (46 cm), cut into strips roughly 3 inches (7.5 cm) wide, or a ball of jute twine
- Tacky craft glue and a low-temperature glue gun
- Masking tape or packing tape, scissors and a pencil
- A strip of thin cardboard, about 1 by 24 inches (2.5 by 61 cm), to stiffen the opening
- Scrap paper or newspaper for stuffing
- Filling: mini pumpkins, gourds, wheat stems, pinecones, felt leaves and faux fruit
Burlap is the woven jute cloth also known as hessian. It frays readily, so cut the strips over a tray or outdoors.
Step 1: Roll the Cone
- Lay the poster board flat with a long edge toward you. Pick up the lower left corner and roll it toward the opposite long edge, keeping one point tight so a cone forms.
- Adjust until the wide end is about 7 to 8 inches (18 to 20 cm) across and the cone is roughly 18 inches (46 cm) long.
- Tape the seam in three places, then run one long strip of tape down the full seam.
- Trim the wide end with scissors so the opening is even all the way around.

Kraft paper makes a softer cone that is easier to bend. If you use it, roll two layers together for strength.
Step 2: Curve the Tip
The upward curl at the narrow end is what turns a cone into a horn.
- Stuff the narrow third of the cone firmly with crumpled scrap paper. This supports the walls so they crease instead of collapsing.
- About 5 inches (13 cm) from the point, pinch the cone gently and bend the tip upward. Make a second, smaller bend about 2 inches (5 cm) farther along to round the curve.
- Wrap tape around each bend to hold the angle.
- Set the cone on the table with the seam underneath and check that it rests steadily without rolling.
Step 3: Wrap in Burlap or Twine
Start at the tip and work toward the opening, so each turn overlaps the one before it like shingles.
- Dot low-temperature hot glue on the very tip and press the end of a burlap strip over it to anchor the wrap.
- Brush or squeeze a band of tacky craft glue around the cone, a few inches at a time.
- Wind the strip around at a slight angle, overlapping by about half an inch (1.3 cm), pulling it snug over the bends.
- Start each new strip on the underside so the joins stay hidden.
- Stop about 1 inch (2.5 cm) short of the opening.
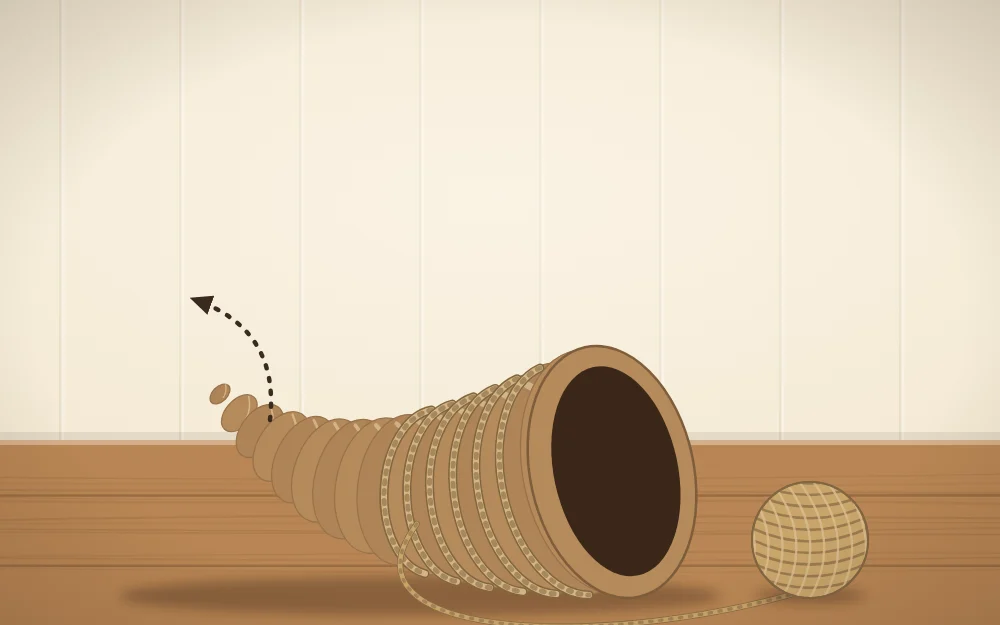
For a twine version, coil jute twine tightly around the glued cone in the same direction. Plan on roughly 50 yards (46 m), though the amount varies with twine thickness.
Safety note
A low-temperature glue gun still burns skin. Press burlap down with a craft stick rather than your fingers, since glue can seep through the open weave.
Step 4: Stiffen the Opening
The mouth of the horn carries the weight of the filling, so it needs a firm rim.
- Glue the thin cardboard strip around the inside edge of the opening, overlapping the ends.
- Fold the last inch of burlap over the rim to the inside and glue it down.
- For a finished edge, glue a braid of three twine strands around the outside of the rim.
- Leave the horn to dry. Drying times are approximate, so follow the glue label, and allow several hours or overnight before filling.
Fill It So It Spills Forward
An arrangement that looks abundant is built in layers from the back of the horn to the table in front of it.
- Inside: push crumpled paper into the back half so the filling sits forward, not lost in the tip.
- At the mouth: wedge in the largest pieces, two or three mini pumpkins or gourds.
- Above and behind: slide wheat stems and a few leaves along the top inside edge so they fan outward. Other ways to use these materials are covered in wheat and corn husk decor.
- On the table: let smaller pieces tumble out in front, such as pinecones, faux fruit, felt leaves and one more mini pumpkin.
Lightweight handmade pieces are useful here, because the paper horn should not carry much weight. A few small paper pumpkins fill space without straining the rim.
Real mini pumpkins and gourds are perishable. They often last a few weeks in cool, dry conditions, so check them every few days and swap out any that soften before they mark the paper. Produce used as decor is for display only, not for eating afterward.
Proportions for a Six-Seat Table
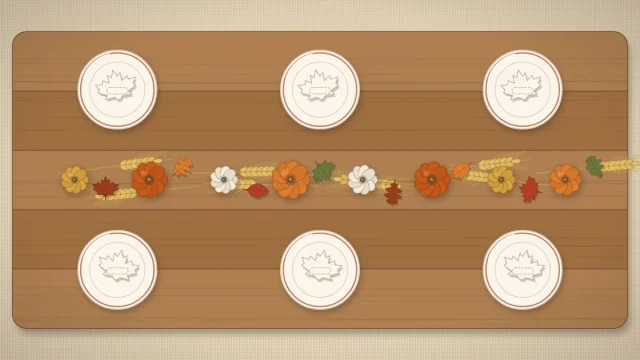
A table for six is usually about 6 feet (1.8 m) long. A horn around 18 inches long with a spill of roughly 8 to 10 inches (20 to 25 cm) in front fills about a third of that length, which leaves room at both ends for serving dishes.
- Set the horn slightly off center, angled so the opening faces down the length of the table.
- Keep the highest wheat stems under about 12 inches (30 cm) so guests can see over them.
- Keep the spill within a strip about 12 inches wide, clear of plates and glasses.
For light, tuck battery LED tea lights among the spilled pieces and never real candles, because paper, burlap and dried wheat burn easily. For placing the horn alongside settings and serving dishes, see these Thanksgiving table decor ideas.
Frequently asked questions
What can I use to make a cornucopia horn at home?
A sheet of poster board or two layers of heavy kraft paper rolled into a cone works well. Tape the seam, stuff the narrow end with crumpled paper, bend the tip upward and cover the whole shape with glued burlap strips or coiled jute twine. No basket weaving is involved.
What do you put inside a cornucopia centerpiece?
Mini pumpkins and gourds at the mouth, wheat stems and leaves fanning out along the top, and smaller pieces such as pinecones, felt leaves and faux fruit tumbling onto the table in front. Crumpled paper in the back half keeps the filling forward. Favor light pieces so the paper rim holds.
How long will a cornucopia with real gourds last?
The paper and burlap horn can be reused for years if stored dry. Real mini pumpkins and gourds are perishable and often last a few weeks in cool, dry conditions. Check them every few days and replace any that soften. Craft pumpkins and faux fruit avoid the problem entirely.