Paper Pumpkin Craft: How to Make 3D Paper Strip Pumpkins
Cut cardstock into equal strips, fasten both ends and fan them into a round 3D pumpkin. Strip sizes for small and medium pumpkins, a glued version, plus a rolled stem and leaf.
Project at a glance
What you need
- Medium-weight cardstock
- Ruler and pencil
- Scissors or paper trimmer
- Single-hole punch
- Two paper fasteners per pumpkin
- Brown and green paper scraps
- Tacky craft glue
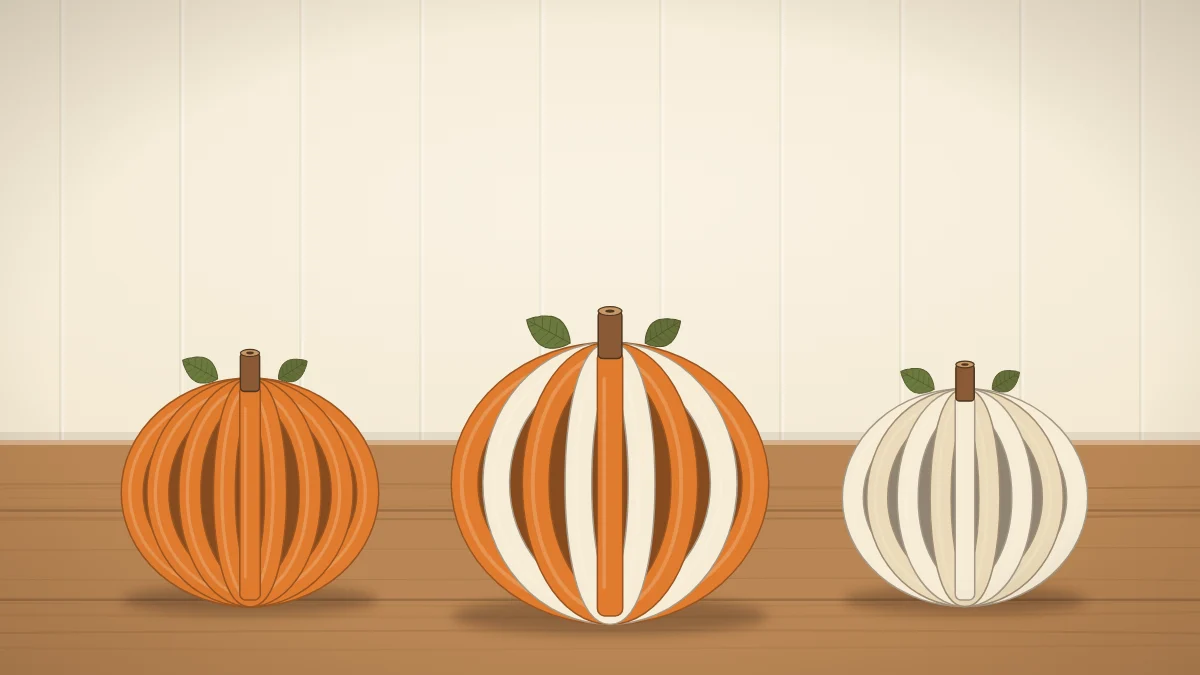
This paper pumpkin craft turns a single sheet of cardstock into a round, three-dimensional pumpkin, using nothing more than straight strips, a hole punch and two paper fasteners. There is no template to print and no tricky folding.
Because every cut is a straight line, it is also a good project to share with children: an adult prepares the strips, and small hands do the satisfying part of fanning them out into a ball.
Materials and tools
- Medium-weight cardstock in orange, cream, white or mustard
- A ruler and pencil
- Scissors, or a paper trimmer if you have one
- A standard single-hole punch
- Two paper fasteners (split pins) per pumpkin, or tacky craft glue
- Scraps of brown and green paper for the stem and leaf
Cardstock matters here. Ordinary printer paper is too soft to hold a curve and the pumpkin slumps, while very heavy card cracks where it bends. If the sheet springs back when you flex it gently, it will work.
Strip sizes for small and medium pumpkins
The finished pumpkin ends up a bit more than half as wide as the strips are long. Treat the widths below as estimates, since stiffer paper makes a rounder, slightly larger ball.
| Pumpkin | Strip size | Number of strips | Finished width |
|---|---|---|---|
| Small | 1/2 inch (1.3 cm) wide, 6 inches (15 cm) long | About 10 to 12 | About 3.5 inches (9 cm) |
| Medium | 3/4 inch (2 cm) wide, 8.5 inches (22 cm) long | About 12 to 14 | About 5 inches (13 cm) |
The medium length is the short side of a letter-size sheet, so you can simply cut strips straight across the page with no measuring along the length. One sheet gives roughly 14 strips at that width, which is enough for one pumpkin.
Cutting and punching the strips
- Mark the widths. Make small pencil marks along both long edges of the sheet at your strip width, then join them with a ruler.
- Cut. Cut along each line. Equal widths matter more than perfectly straight edges, because narrow and wide strips side by side make a lopsided ball.
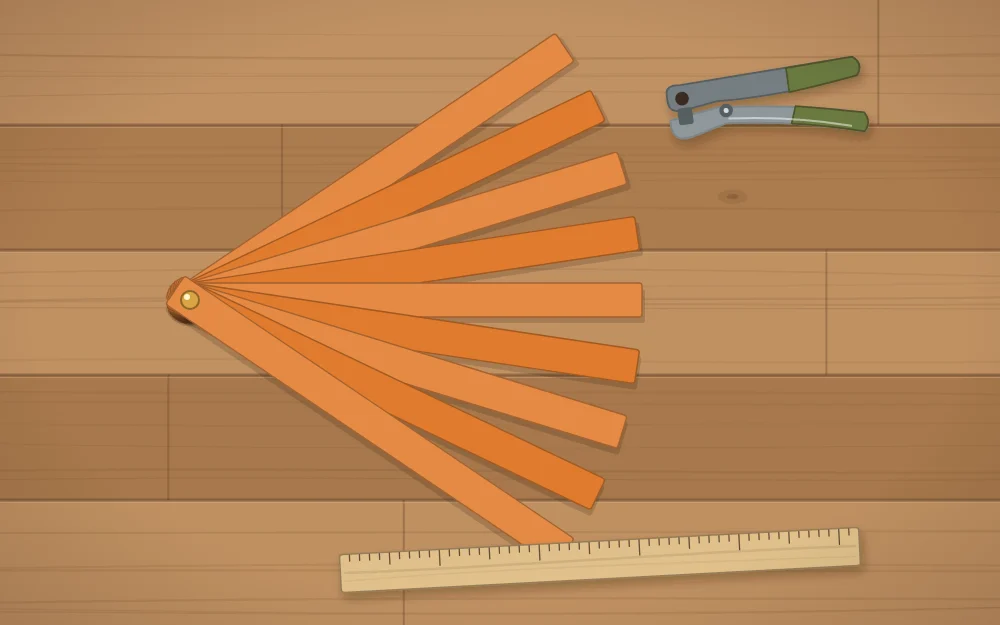
- Punch both ends. Punch a hole at each end of every strip, centered across the width and about 1/4 inch (6 mm) in from the end. Punch two or three strips at a time so the holes line up.
- Stack. Pile the strips neatly with the holes aligned.
Safety note
An adult should do the cutting, especially with a paper trimmer or craft knife. Paper fasteners have pointed legs and are small enough to swallow, so keep them away from small children and pets.
Assembling the paper strip pumpkin
- Fasten the bottom. Push a paper fastener through the holes at one end of the stack and open its legs flat against the paper.
- Curve the stack. Bend the whole stack into a loose C shape so the free ends come up over the fastened end.
- Fasten the top. Push the second fastener down through the holes at the free end, from the outside in, and open the legs. You now have a flat hoop of stacked strips.
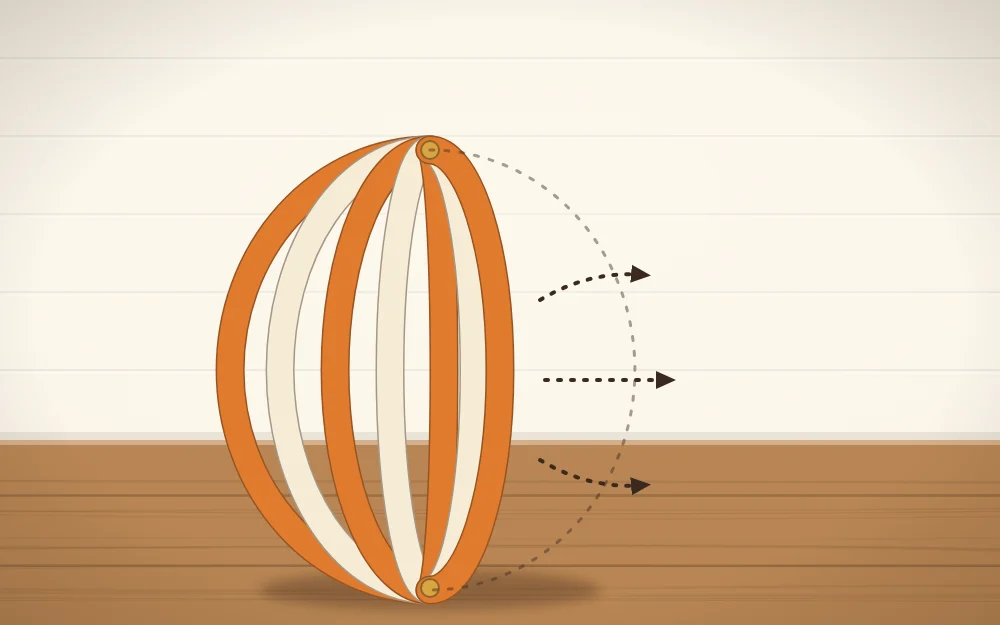
- Fan the strips. Hold the top fastener and slide the strips apart one at a time, turning each a little further than the one before, until they are spread all the way around.
- Even it out. Look down from above and nudge the strips until the gaps match. Press gently on the top to settle the ball into a slightly squat pumpkin shape.
The glued version, without fasteners
If you have no paper fasteners, skip the hole punch. Cut two paper circles about the size of a large coin. Glue one end of every strip to the first circle like the spokes of a wheel, let the glue grab, then bring each free end up and glue it to the underside of the second circle in the same order. Tacky craft glue holds cardstock better than a glue stick; give it time to set, following the label, before you handle the pumpkin.
Adding a rolled paper stem and a leaf
For the stem, cut a strip of brown paper about 1 inch (2.5 cm) wide and 4 inches (10 cm) long. Roll it tightly around a pencil, glue down the end and slide it off. Snip four short slits into one end, fold the resulting tabs outward and glue them over the top fastener, which hides it neatly.
For the leaf, fold a scrap of green paper in half, cut half a leaf shape against the fold and open it out; the crease becomes the center vein. Glue the leaf beside the stem. To add a tendril, wind a very thin strip of green paper around the pencil and tuck one end under the stem.
Variations to try
- Two-color strips. Stack the strips in an alternating order, such as orange and cream, before you fasten them. When fanned out, the colors alternate around the pumpkin.
- Book-page paper. Pages from a damaged old book give a soft vintage look. They are thin, so glue each page to plain cardstock first and cut the strips once the glue is dry.
- Patterned paper. Scrapbook paper with a small plaid or dot print works well, as long as it is cardstock weight.
- A flatter pumpkin. Use more strips than the table suggests and press the top down further. Tie a short piece of thread between the two fasteners on the inside to hold the squat shape.
Where to display paper pumpkins
A row of three in mixed sizes looks good on a bookshelf or windowsill, and a small one makes a cheerful marker at each seat, as described in the guide to fall place setting ideas. Paper pumpkins also pair naturally with a paper leaf garland cut from the same cardstock, since the colors match exactly.
Paper is for indoor use only: damp air softens the curve, and direct sun fades orange cardstock over a season. Keep paper decor well away from candles, heaters and any other heat source, and use battery LED tea lights if you want a glow nearby.
If you would like something sturdier that can be squeezed into a basket or handled by toddlers, no-sew fabric pumpkins are the better choice. To keep paper pumpkins for next year, either store them whole in a rigid box with nothing on top, or open the fasteners and store the strips flat.
Frequently asked questions
How many strips do I need for a paper strip pumpkin?
Plan on about 10 to 12 strips for a small pumpkin and about 12 to 14 for a medium one. Fewer strips leave wide gaps and a see-through, airy look; more strips give a fuller ball. Wider strips need fewer pieces to cover the same space, so adjust to suit your paper.
Can I make paper pumpkins with regular printer paper?
Printer paper is usually too soft to hold the curve, so the pumpkin tends to sag within a day or two. If it is all you have, glue two sheets together and let them dry flat under a book before cutting, or keep the pumpkin very small so the strips are short.
Is this paper pumpkin suitable for young children?
The fanning and decorating steps suit most children with help, but an adult should cut the strips and handle the paper fasteners, which have pointed legs and are a swallowing risk. For the youngest crafters, use the glued version with paper circles and skip the fasteners entirely.