Fall Banner DIY: A Fabric Pennant Banner to Hang
A no-sew pennant banner in burlap, canvas or felt, with template dimensions for triangle and swallowtail flags, leaf, pumpkin and acorn shapes to add, and how to fold and glue the flags over twine.
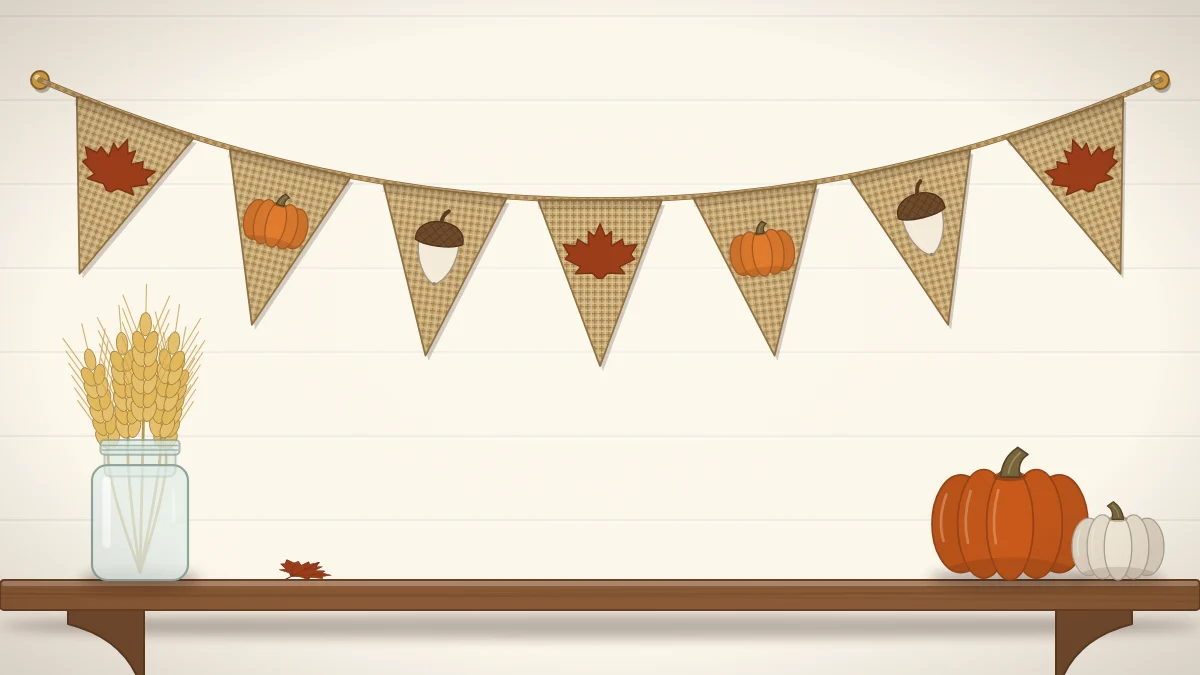
Project at a glance
What you need
- Burlap, canvas or felt, about half a yard (46 cm)
- Jute twine, about 7 ft (2.1 m)
- Stiff paper for the template
- Fabric scissors and ruler
- Tacky craft glue or low-temperature glue gun
- Acrylic craft paint and sponge, or felt scraps
This fall banner DIY makes a row of fabric pennant flags on twine, each one decorated with a simple seasonal shape instead of a letter. There is no sewing: the flags are cut, decorated, folded over the twine and glued.
Because the flags carry shapes and not words, you can make as many or as few as the space needs, rearrange them freely, and never run out of room for the last letter.
Supplies for a Seven-Flag Banner
- Burlap, canvas or felt, about half a yard (46 cm)
- Jute twine, about 7 feet (2.1 m)
- Stiff paper or thin cardboard for the template
- Sharp fabric scissors, a ruler and a pencil or chalk
- Tacky craft glue or a low-temperature glue gun
- Acrylic craft paint and a small sponge, or felt scraps for cut shapes
If you are starting from an empty craft drawer, the fall craft supplies starter kit explains which glues and cutting tools are worth owning for projects like this one.
Triangle or Swallowtail: Making the Template
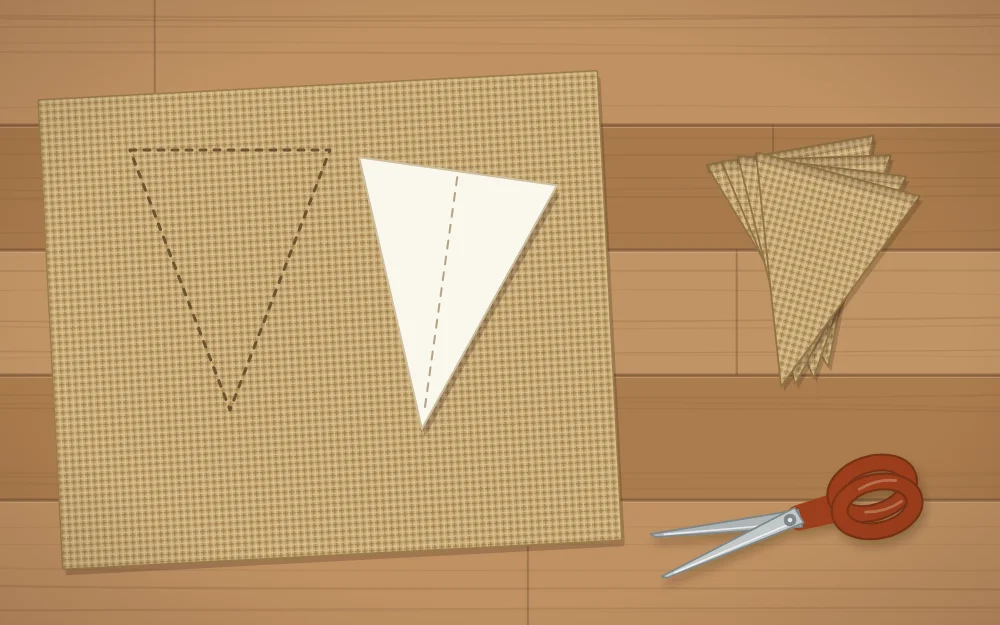
Both shapes begin with the same rectangle, and both include an extra strip at the top that folds over the twine. Draw the template on stiff paper so it survives being traced several times.
Triangle pennant
Draw a rectangle 5 inches (13 cm) wide and 8 inches (20 cm) tall. Mark a line 1 inch (2.5 cm) down from the top; that strip is the fold-over. Mark the center of the bottom edge. Draw a line from each end of the fold line down to that center mark and cut along both lines. The finished flag will hang about 7 inches (18 cm) long.
Swallowtail pennant
Start with the same 5 by 8 inch rectangle and the same 1 inch fold strip. This time keep the sides straight. Mark the center of the bottom edge, measure 2 inches (5 cm) straight up from it, and draw a line from each bottom corner to that point. Cut out the notch to leave two tails.
Choosing and Cutting the Fabric
Each fabric behaves a little differently, so pick the one that suits the look you want and the tools you have.
| Fabric | Look | Edges | Best decoration |
|---|---|---|---|
| Burlap | Rustic, open weave | Frays; seal with glue | Sponged paint or felt shapes |
| Canvas | Smooth, crisp | Frays slightly | Painted or stenciled shapes |
| Felt | Soft, solid color | Does not fray | Glued felt shapes |
Trace the template onto the fabric with a pencil or chalk and cut just inside the line. On burlap, line up the straight sides of the template with the threads of the weave so the flag does not twist. To slow fraying, run a thin line of tacky glue along the cut edges with a fingertip and let it dry clear, or simply pull away a few loose threads and accept a slightly frayed edge as part of the style.
Turning the template point up, then point down, lets triangle flags nest together and wastes very little fabric. Adults should handle any cutting done with a craft knife.
Decorating Each Flag with a Shape
A leaf, a pumpkin and an acorn, repeated in turn, give a seven-flag banner a clear rhythm: leaf, pumpkin, acorn, leaf, pumpkin, acorn, leaf. Keep each shape about 3 inches (8 cm) tall so it sits comfortably inside the flag with a margin all around.
Felt-cut shapes
Draw each shape on paper, cut it out and trace it onto felt. Cut the pumpkin as a slightly squashed circle with a small brown stem, the acorn as an oval with a darker cap across the top, and the leaf as a pointed oval. Glue the pieces to the flag and press them under a book for a few minutes.
Painted or stenciled shapes
To make a stencil, draw the shape on stiff paper and cut it out so you are left with a shaped hole. Hold the stencil flat on the flag, load a small sponge with a little acrylic craft paint, blot most of it off on scrap paper, then dab straight down through the opening. A nearly dry sponge gives a clean edge; a wet one bleeds under the stencil, especially on burlap.
Slip a sheet of scrap paper under burlap flags before painting, because paint passes through the open weave. Let the flags dry flat for as long as the paint label suggests before moving on.
Tip
Paint one spare flag first. It shows you how much paint the fabric soaks up and gives you a practice run before you touch the real set.
Folding the Top Edge Over the Twine
- Lay the dry flags face down in order. Stretch the twine across them along the fold line, 1 inch (2.5 cm) below the top edge.
- Leave about 12 inches (30 cm) of bare twine before the first flag for tying.
- Run a line of glue along the top strip of the first flag, just above the twine.
- Fold the strip down over the twine and press firmly. Keep glue off the twine itself if you want to slide the flags later; glue the twine in if you want them fixed.
- Repeat with each flag, checking the gap as you go, and leave another 12 inches of twine at the far end.
A low-temperature glue gun sets quickly but can still burn skin, so press the fold with the handle of a spoon and not a fingertip.

Spacing and Total Length
Gaps of about 1 inch (2.5 cm) between flags look tidy and let the banner curve. With 5 inch flags, seven of them cover roughly 41 inches (104 cm). Add the two tying ends and you need about 5.5 feet (1.7 m) of twine; cutting 7 feet leaves a comfortable allowance. For a wider space, each extra flag adds about 6 inches (15 cm).
Where to Hang It
Tie the ends to removable adhesive hooks along a shelf, across a window, on a headboard or over a sideboard. Fabric and twine burn easily, so keep the banner well away from a working fireplace, stove or heater.
The banner pairs well with a lighter strand below it, such as a paper leaf garland. Later in the season it fits straight into a harvest display; the roundup of DIY Thanksgiving decorations has ideas for building around it. Store it rolled, not folded, so the painted shapes do not crease.
Frequently asked questions
What size should the flags be for a pennant banner?
A rectangle 5 inches wide and 8 inches tall is a practical starting size. The top inch folds over the twine, leaving a flag that hangs about 7 inches long. Scale it up for a large wall or down for a small shelf, keeping the same proportions.
How do I stop burlap flags from fraying?
Cut along the threads of the weave where you can, then run a thin line of tacky craft glue along each cut edge and let it dry clear. You can also pull away the loosest threads and leave a short fringe, which suits the rustic look of burlap.
Can I make the banner without paint?
Yes. Cut the leaf, pumpkin and acorn shapes from felt scraps and glue them onto each flag. Felt shapes give solid color and clean edges on any fabric, and there is nothing to dry except the glue, so the banner is ready to hang sooner.

